
I decided to make the sella curulis of pear wood for two reasons. First it is historically correct (the St. Admont folding chair in the MAK in Vienna is also made in pear). Secondly, because pear has a nice pinkish colour. I will not paint the sella curulis; just decorate it with chip carving. Pear is also relatively easy to carve, at least a lot easier than oak.

The quartered pear plank with the markings of the chair stands.
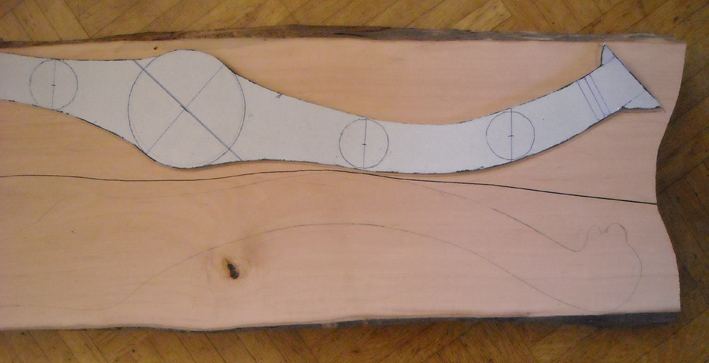

The drawing model card used to fit the chair stands on the pear plank.
I had acquired a pear plank of around 5 cm thickness. With a bit of puzzling, the four chair stands just fitted the size of the plank. I then cut the plank into two pieces with a scroll-saw to be able to manage the plank later when using the band-saw. Using the band-saw I again halved the plank, so I had 4 pieces. These were planed to exactly 5 cm, after which they were cut more precisely with the band-saw to four chair stands. These were shaved with a spoke shave to smoothen the saw cut.

Two of the four band-sawn chairstands of the sella curulis

Two smoothed chair stands ready for the next step.
The next step was to drill a hole for the connecting rail in the centre of the X, using a machine drill and a 3 cm forstner bit. As the connecting rail is meant to be invisible from the outside, the outside stands were not drilled through like the stands on the inside.
Then I had to remove half of the thickness of the centre parts by router in order to have the chair parts at the same level. For routing, I made a small jig, which made it easier to manoeuvre the router which was equipped with a guide bush. After routing, the remaining parts missed by the router were removed using a chisel. This allowed the parts of the X to be perfectly fitted.

The part to be removed is marked by pencil. Note that this chair stand is for the inside of the chair as it is drilled through.

The routing jig is fixed by clamps onto the chair stand.

Movement of the router is restricted by the jig and the guide bush.

Two finished parts of the sella curulis, an inside and an outside of an X stand.

Two parts of one X clearly show the perfect fit of the connection. Side view (top) and front view (below).


The chair stands give already a rough impression of the final sella curulis.
Behind the chair, the medieval tool chest Bram is working on.

The 4 chair stands of the sella curulis showing the folded situation of the chair.
The making of the sella curulis will be continued in another post with the different side rails that connect the two X-stands.
This comment has been removed by a blog administrator.
ReplyDelete